How to deploy Tensorflow models on Sagemaker
13 February 2019 There are lots of materials on how to train neural networks but not as many
showing how to deploy them to power real services. In this post I’ll share a
minimal example of how I train tensorflow models and deploy them on Sagemaker.
I’ll cover items that I found intimidating so hopefully they become less
intimidating to you.
There are lots of materials on how to train neural networks but not as many
showing how to deploy them to power real services. In this post I’ll share a
minimal example of how I train tensorflow models and deploy them on Sagemaker.
I’ll cover items that I found intimidating so hopefully they become less
intimidating to you.
The code is available on github.
Tensorflow is a deep learning framework from google. It is a skill that is in demand from employers. One of the best resources for learning it is Hands-On ML with Scikit-learn & Tensorflow. If you have heard of Keras, it was folded into Tensorflow and the two are now the same thing.
Amazon Sagemaker is a full-lifecycle Machine Learning suite. You may have heard that ML is a multistep process. You collect data, clean data, train on data, deploy data, collect more data and retrain your models. Sagemaker has hosted gpu-enabled ipython notebooks where you can do your data exploration and model training. Sagemaker also allows you to programmatically launch large training jobs, perform hyperparameter optimization and deploy your models to production.
Costwise Sagemaker is comparable to other cloud providers. The cheapest gpu enabled
instance is the ml.p2.xlarge ($1.26/hour). The cheapest deploy node is the
ml.t2.medium ($47/month). Our dataset is from the Registry of Open Data on
AWS which we can use for free as long as we only
transfer data within aws.
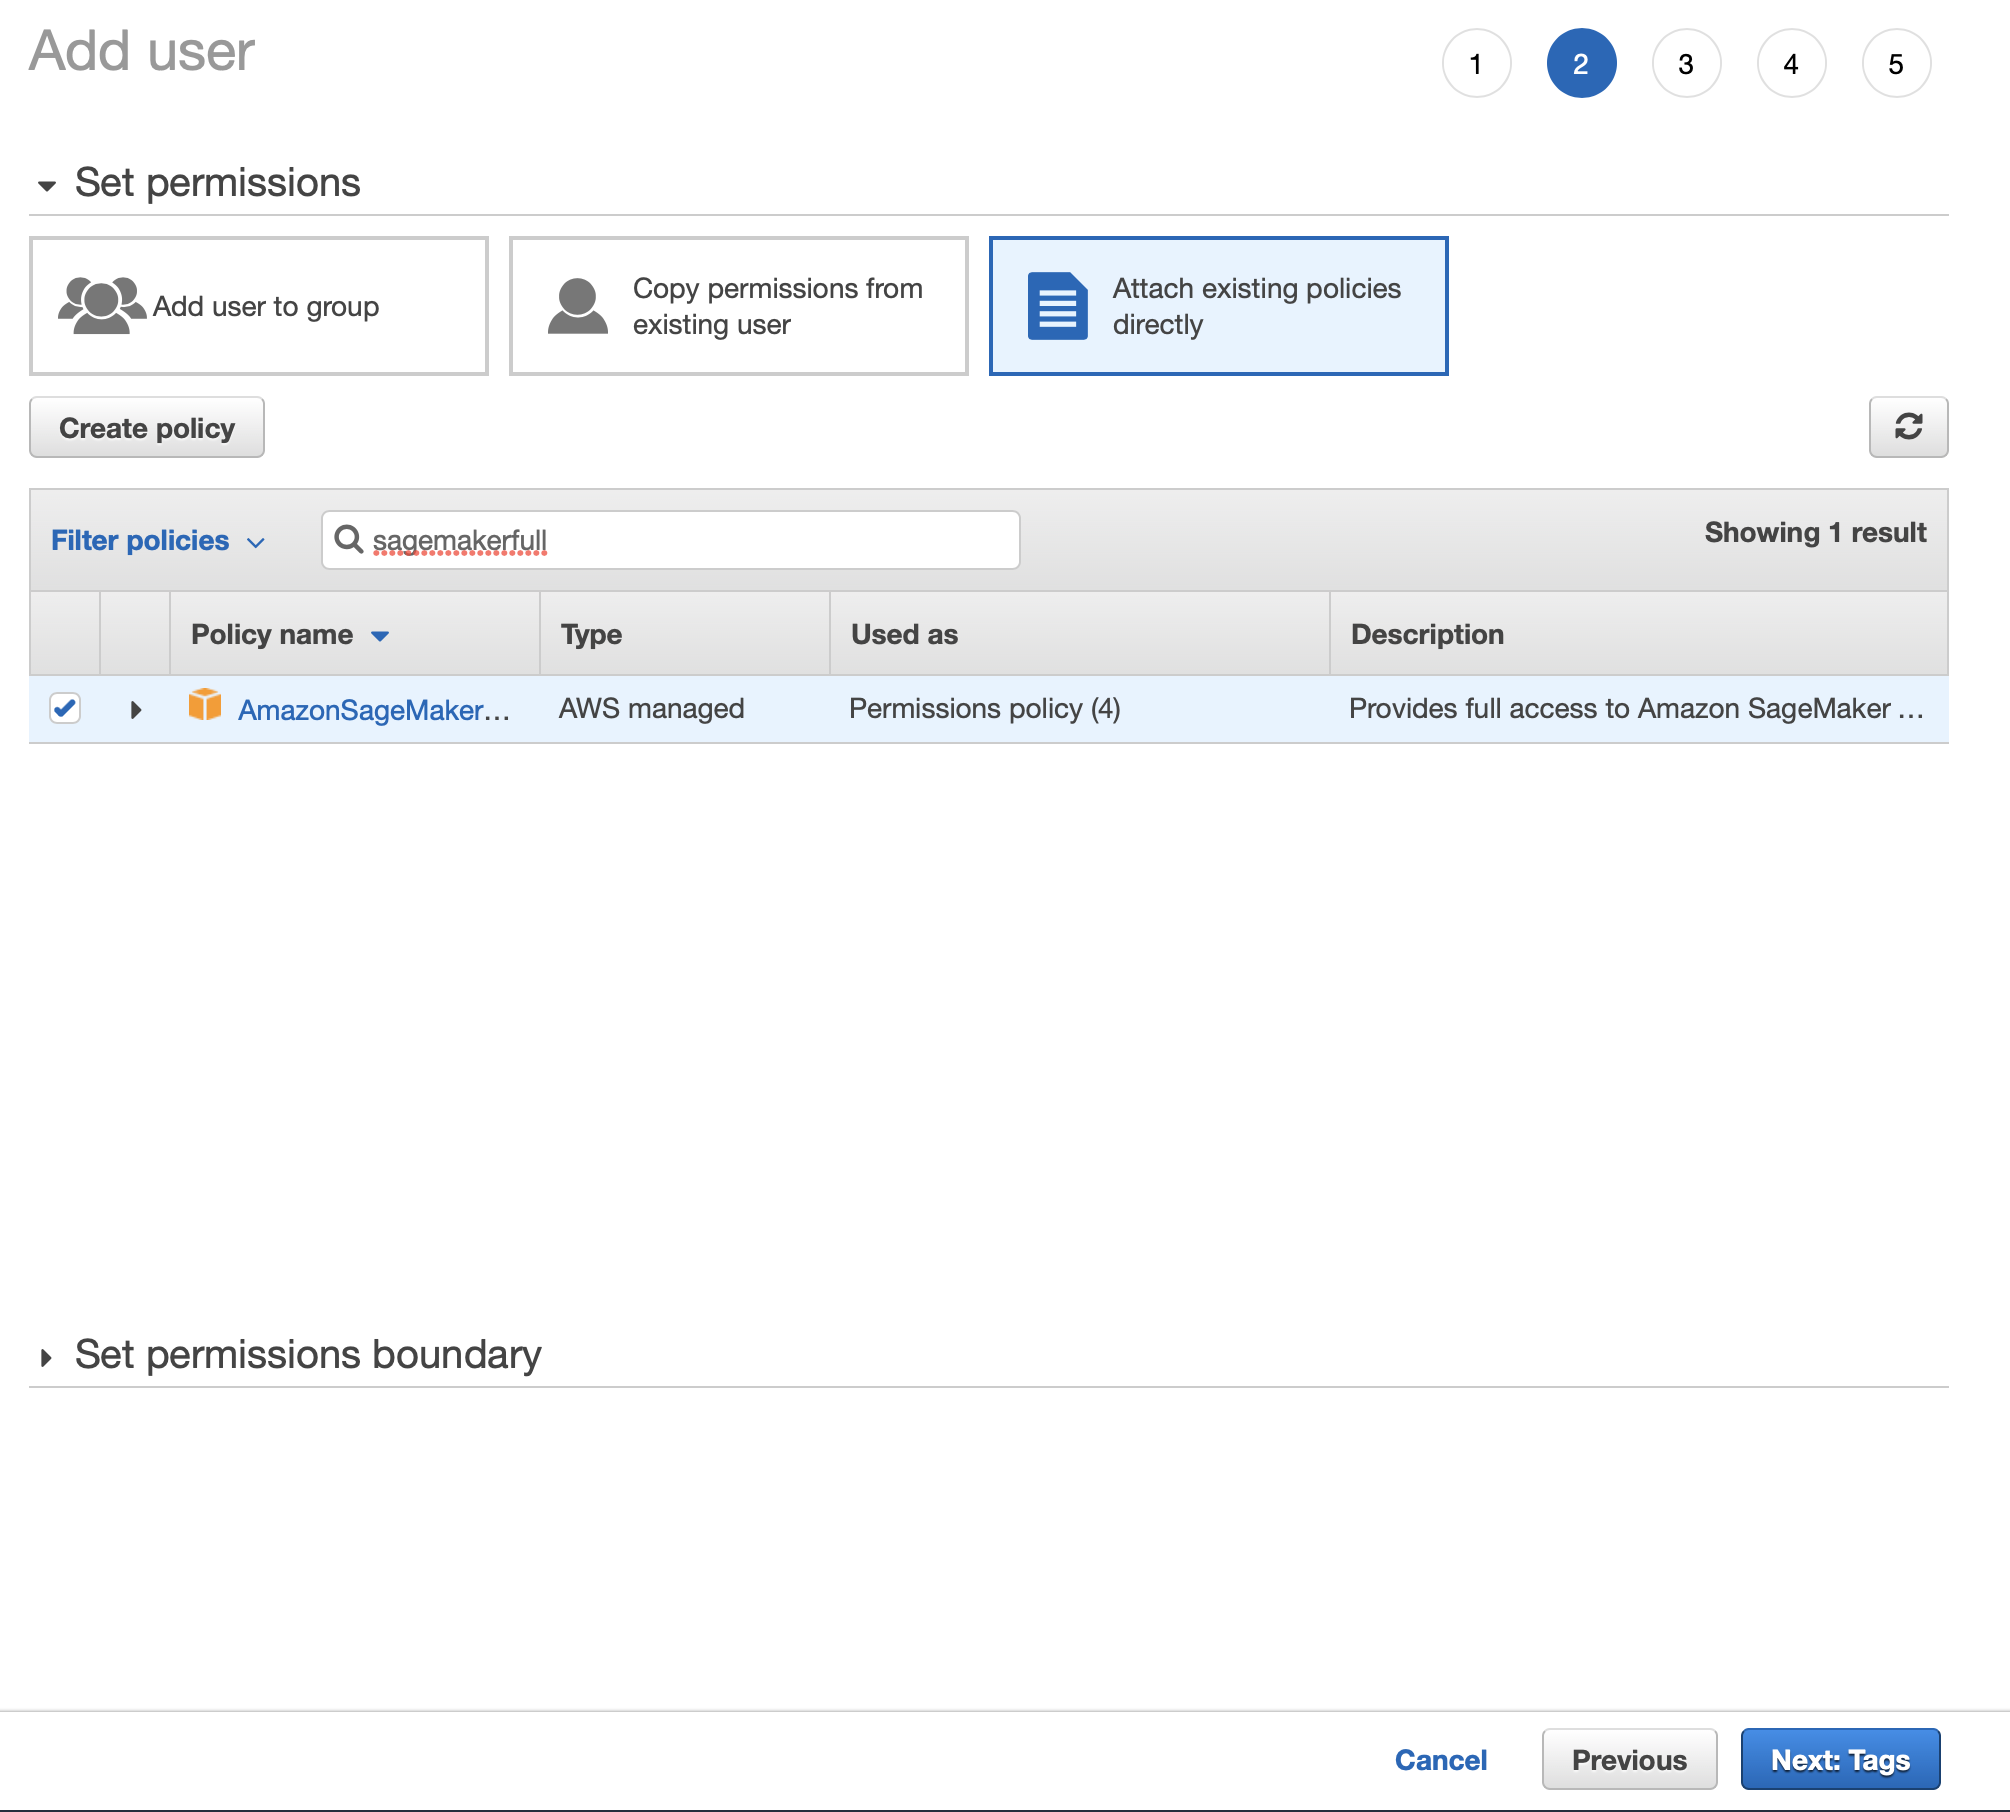
You should use IAM to provision accounts with
restricted permissions. This is what you’d be expected to do in a work
environment so it’s best to become familiar with the process. You can choose
the AmazonSageMakerFullAccess policy to grant the permissions needed for this
tutorial.
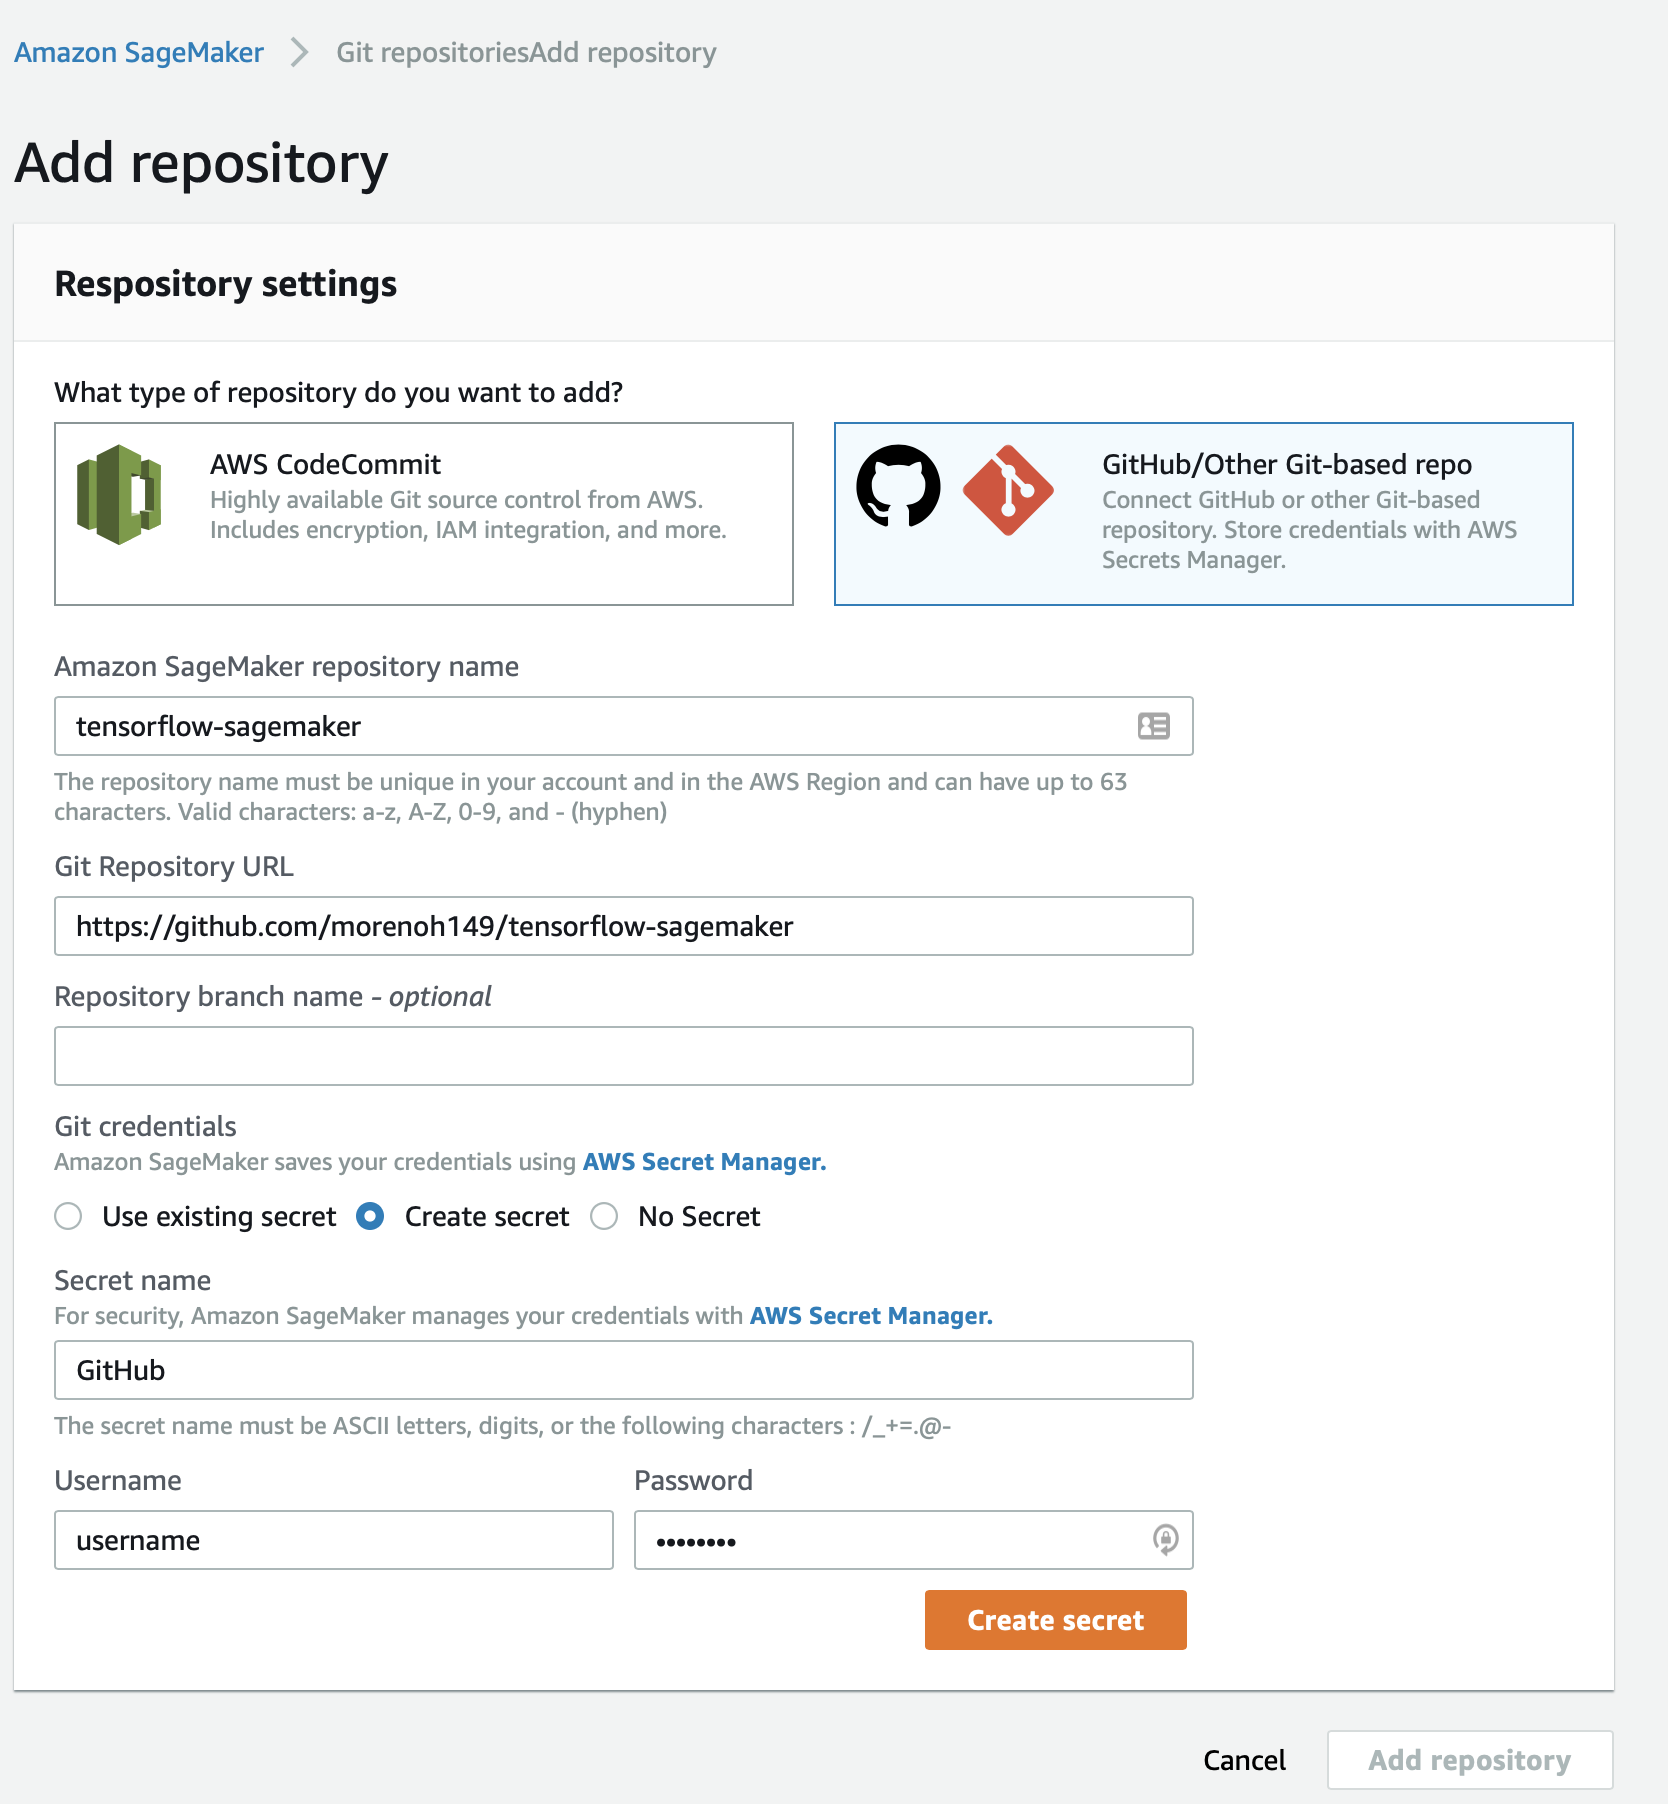
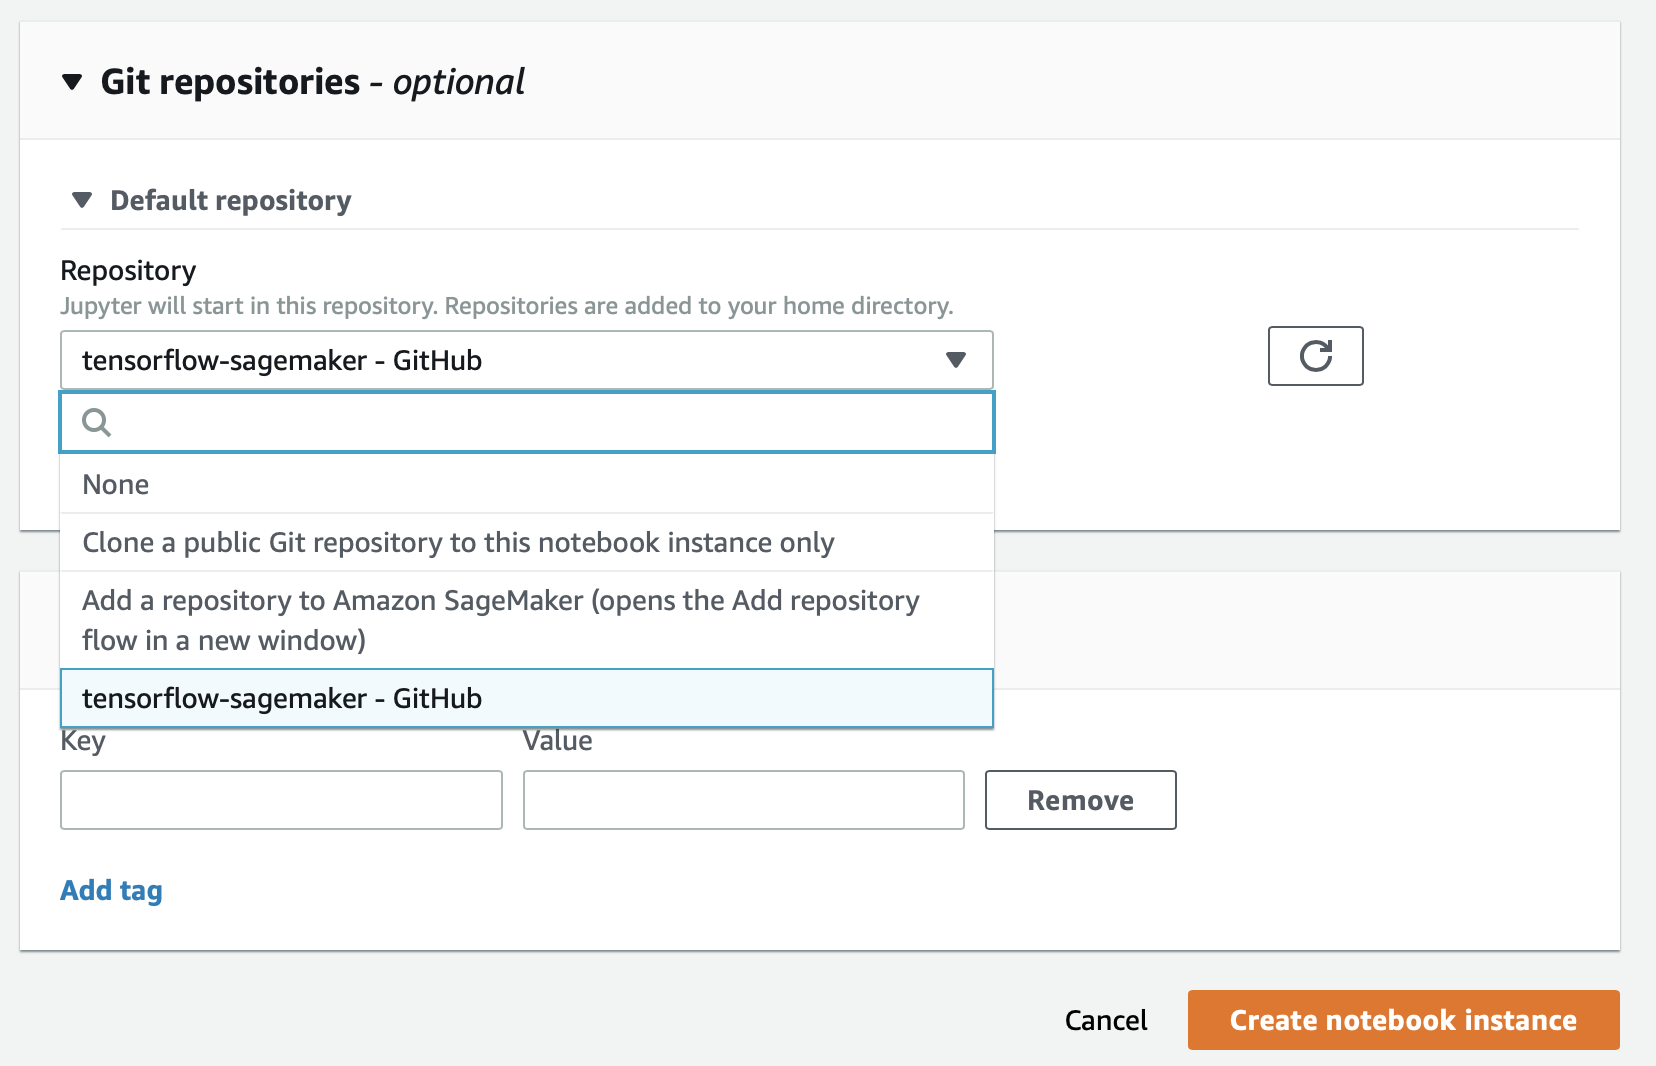
Optionally, you can configure your user to pull items from github.
You need to give your user your github password so it can fetch items
directly from github. You can do this inside sagemaker under Notebook > Git repositiories.
Add a repository and pass in the info. You can use the repo I shared.
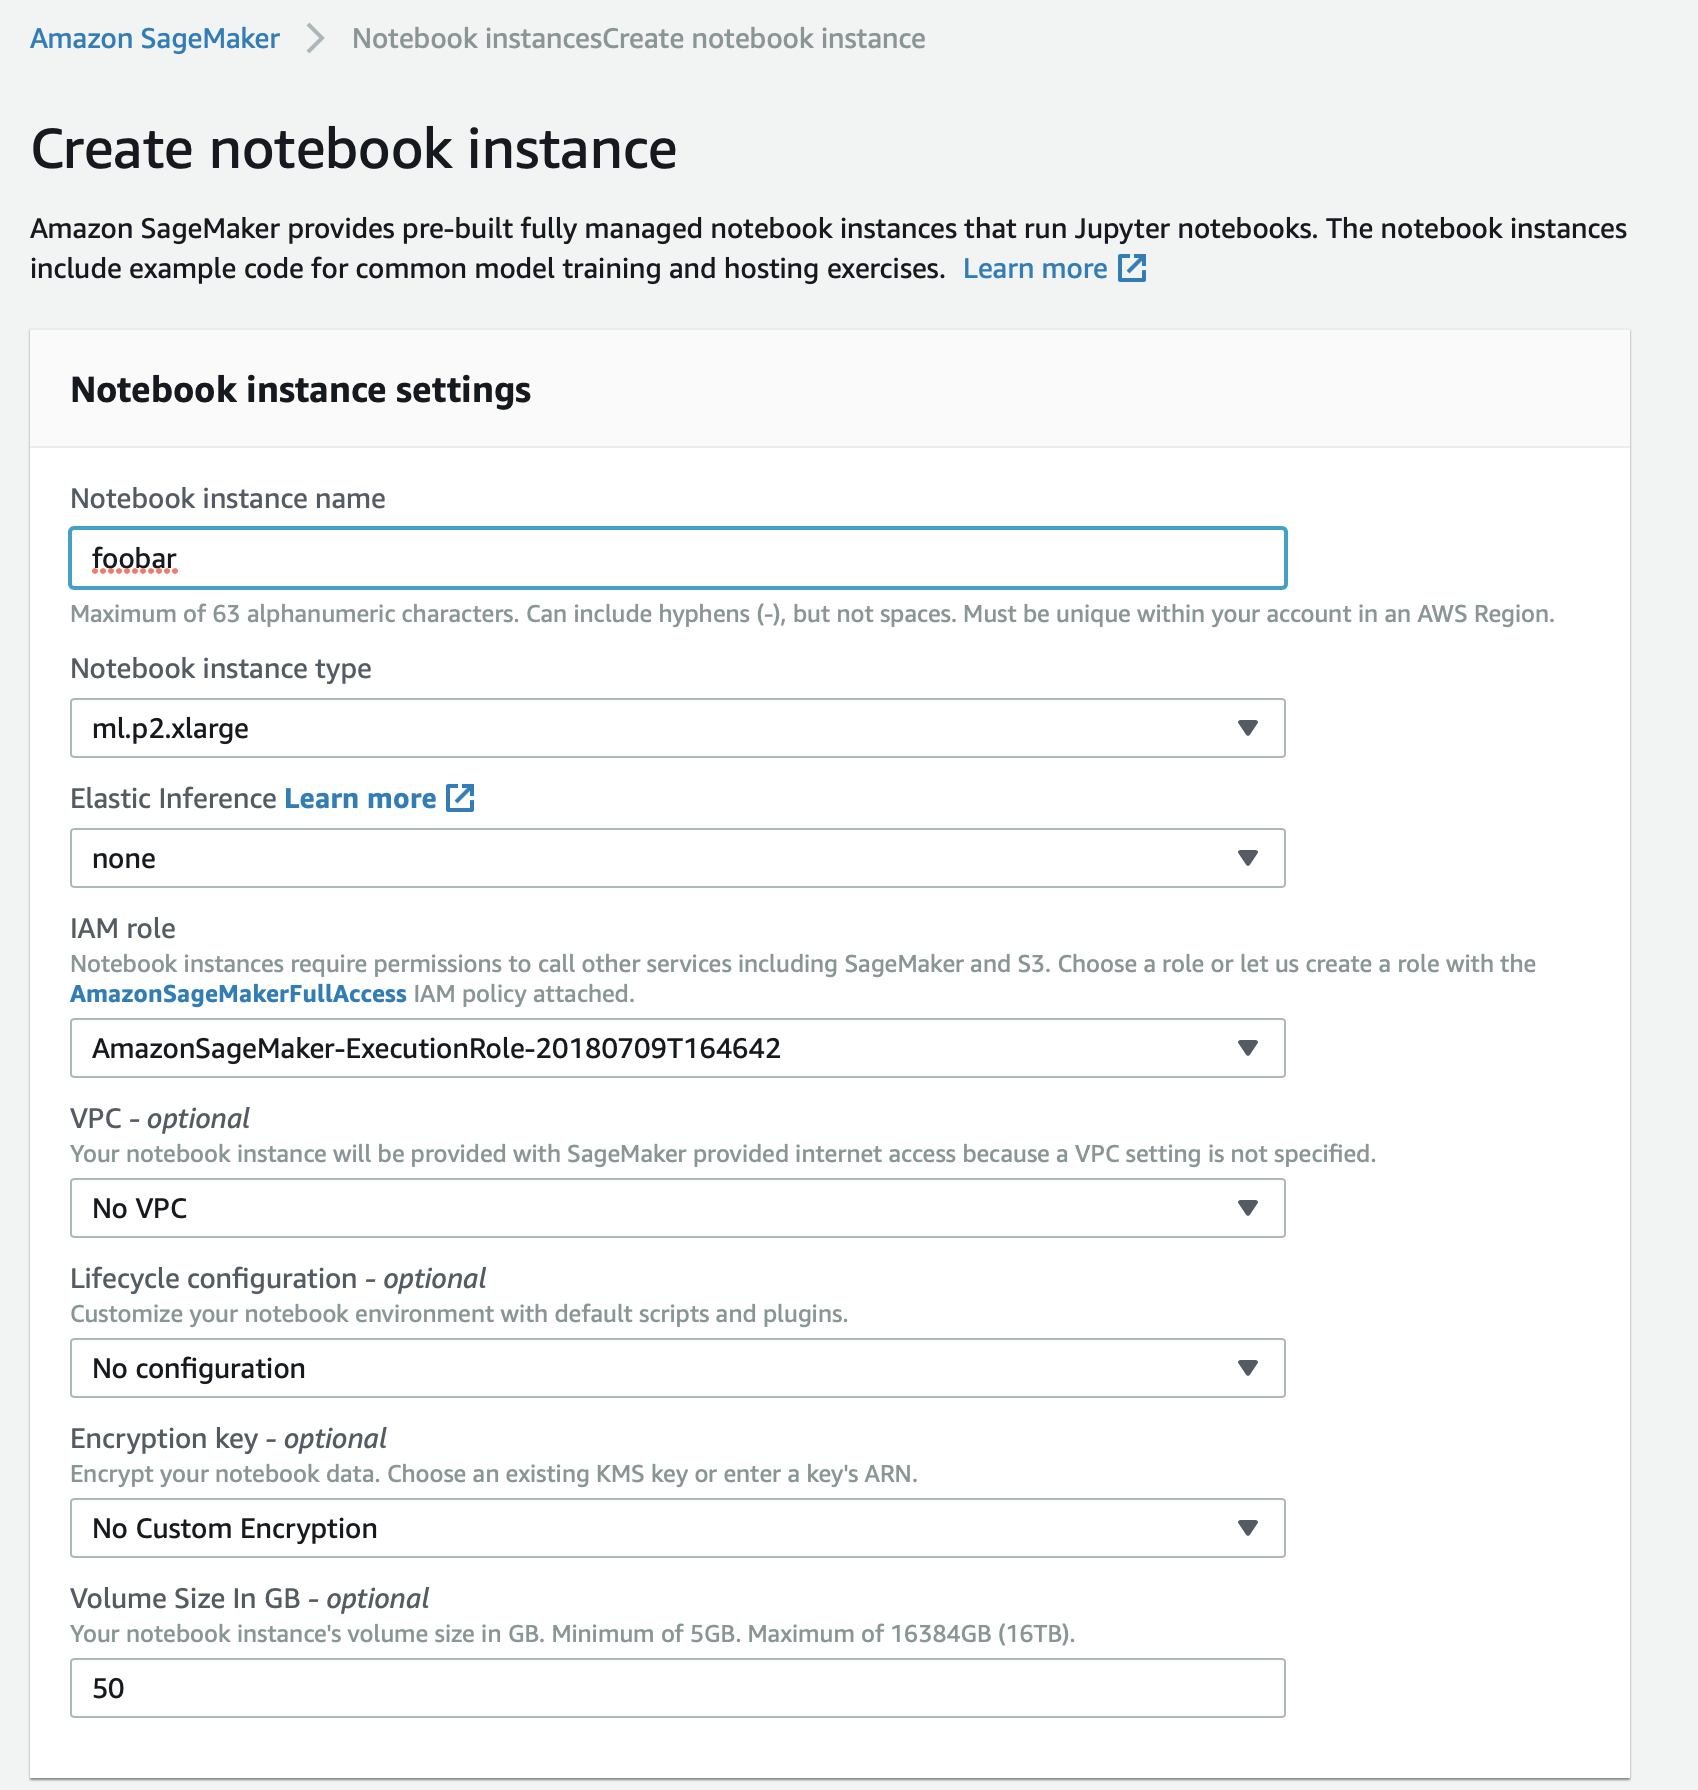
Start a Notebook. Pick a gpu enabled instance type (for example ml.p2.xlarge).
Crank up the diskspace (I used 50 GB). And pick a github repo if you want.
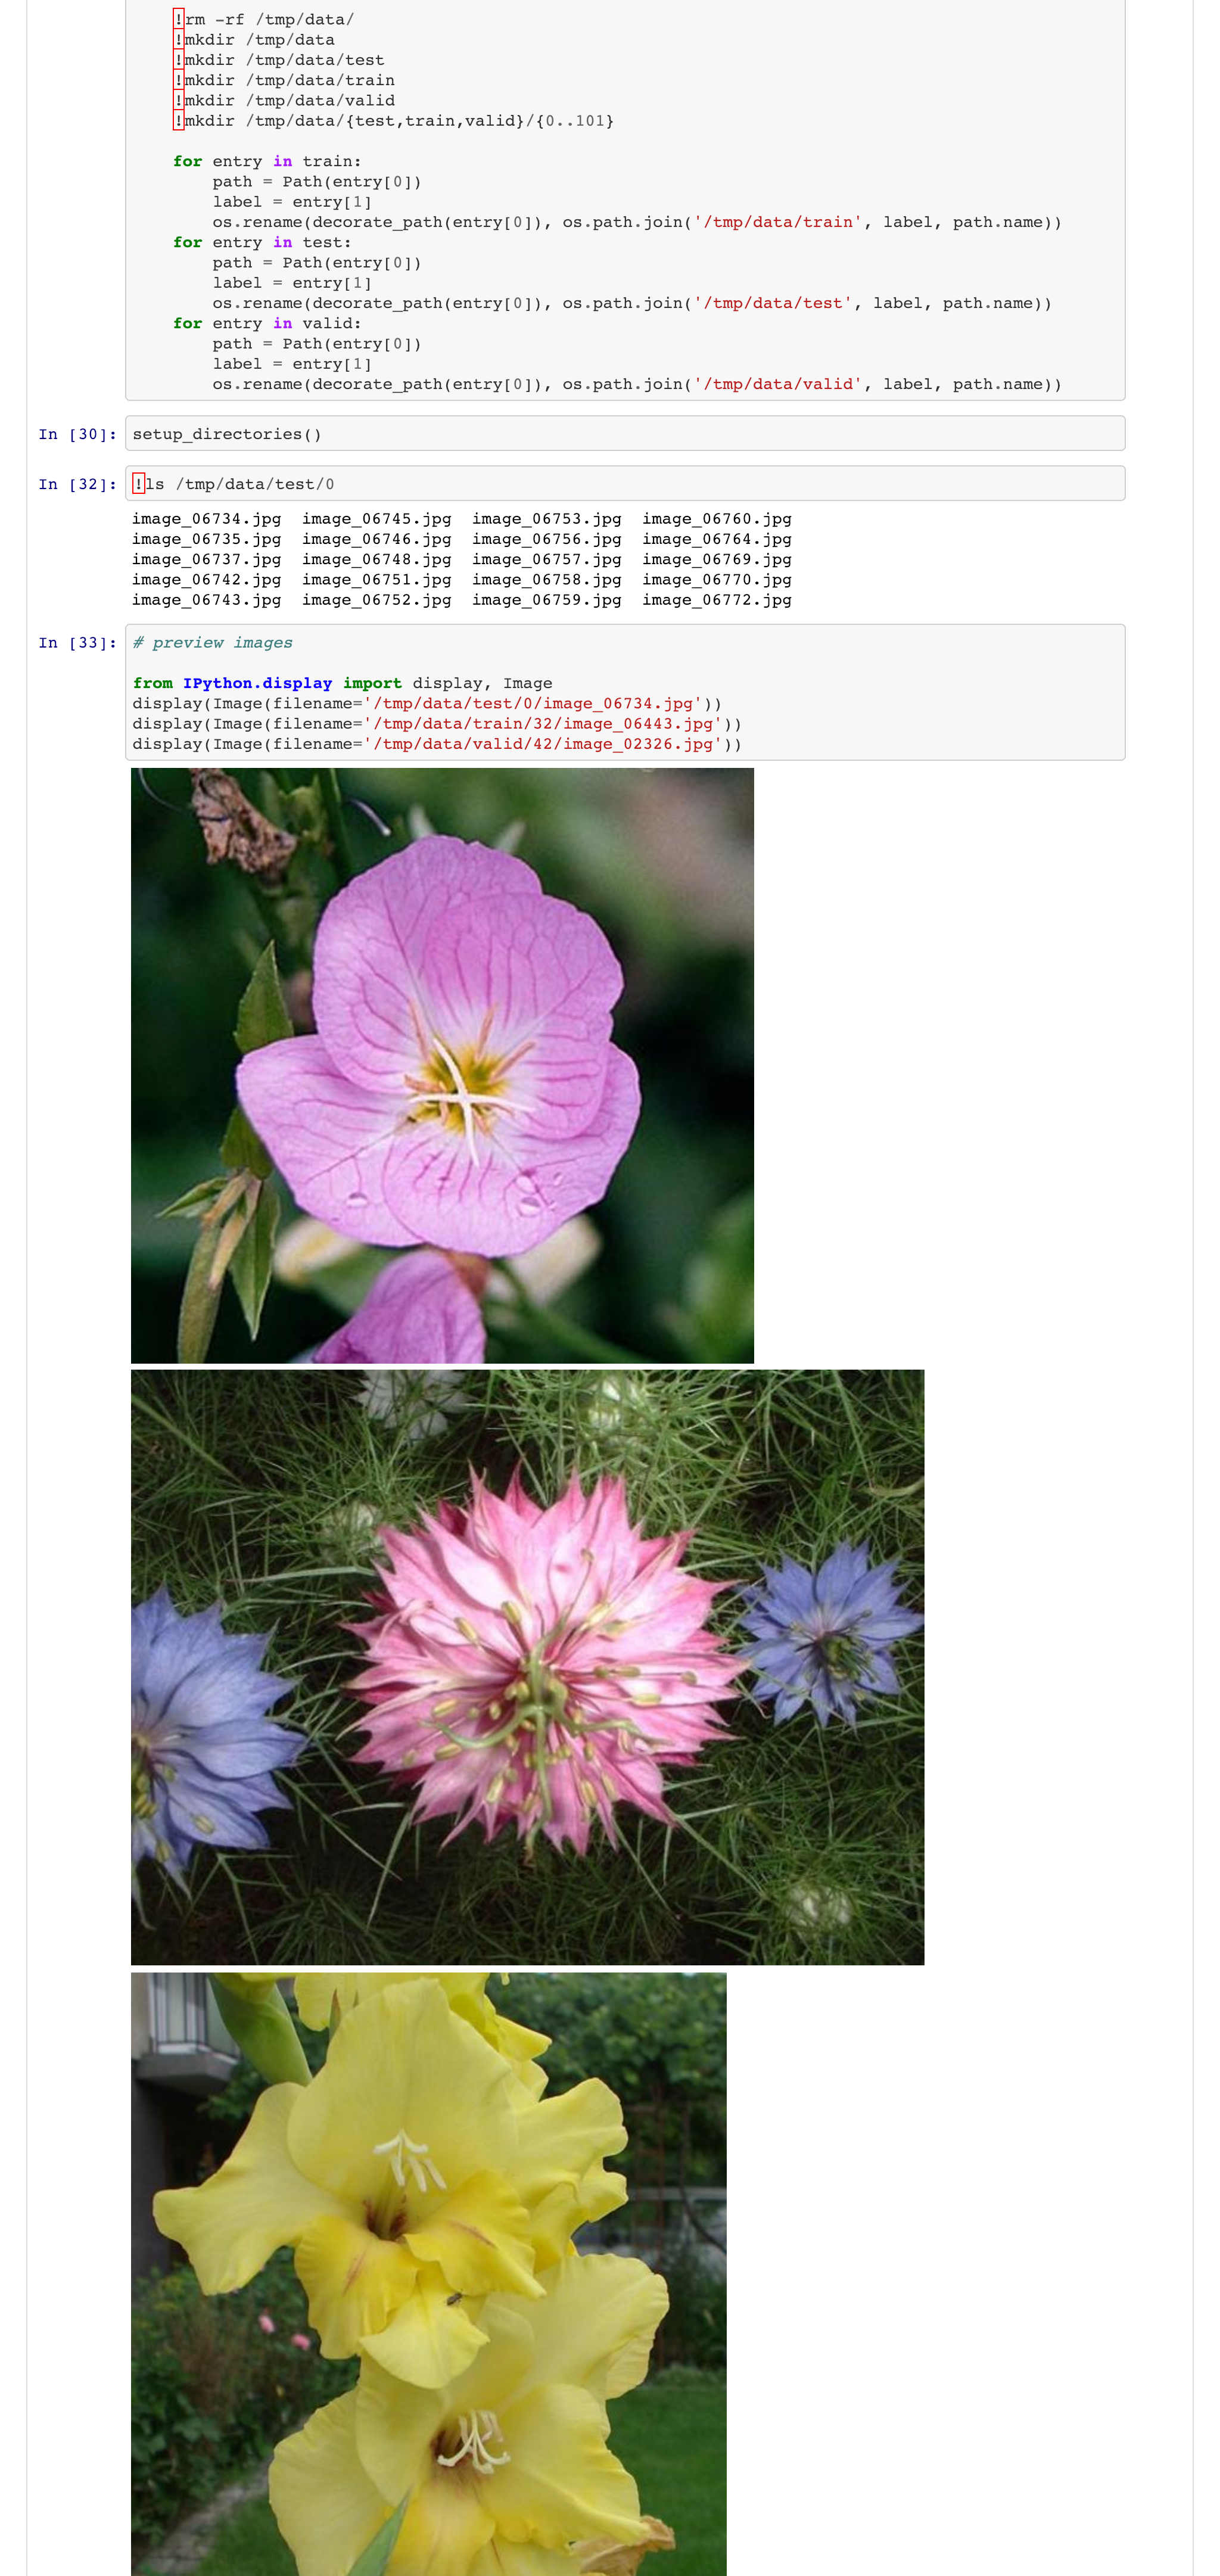
Run the Explore and Train notebook. This notebook loads the oxford 102 flowers dataset, trains a CNN using transfer learning and saves the model to disk.
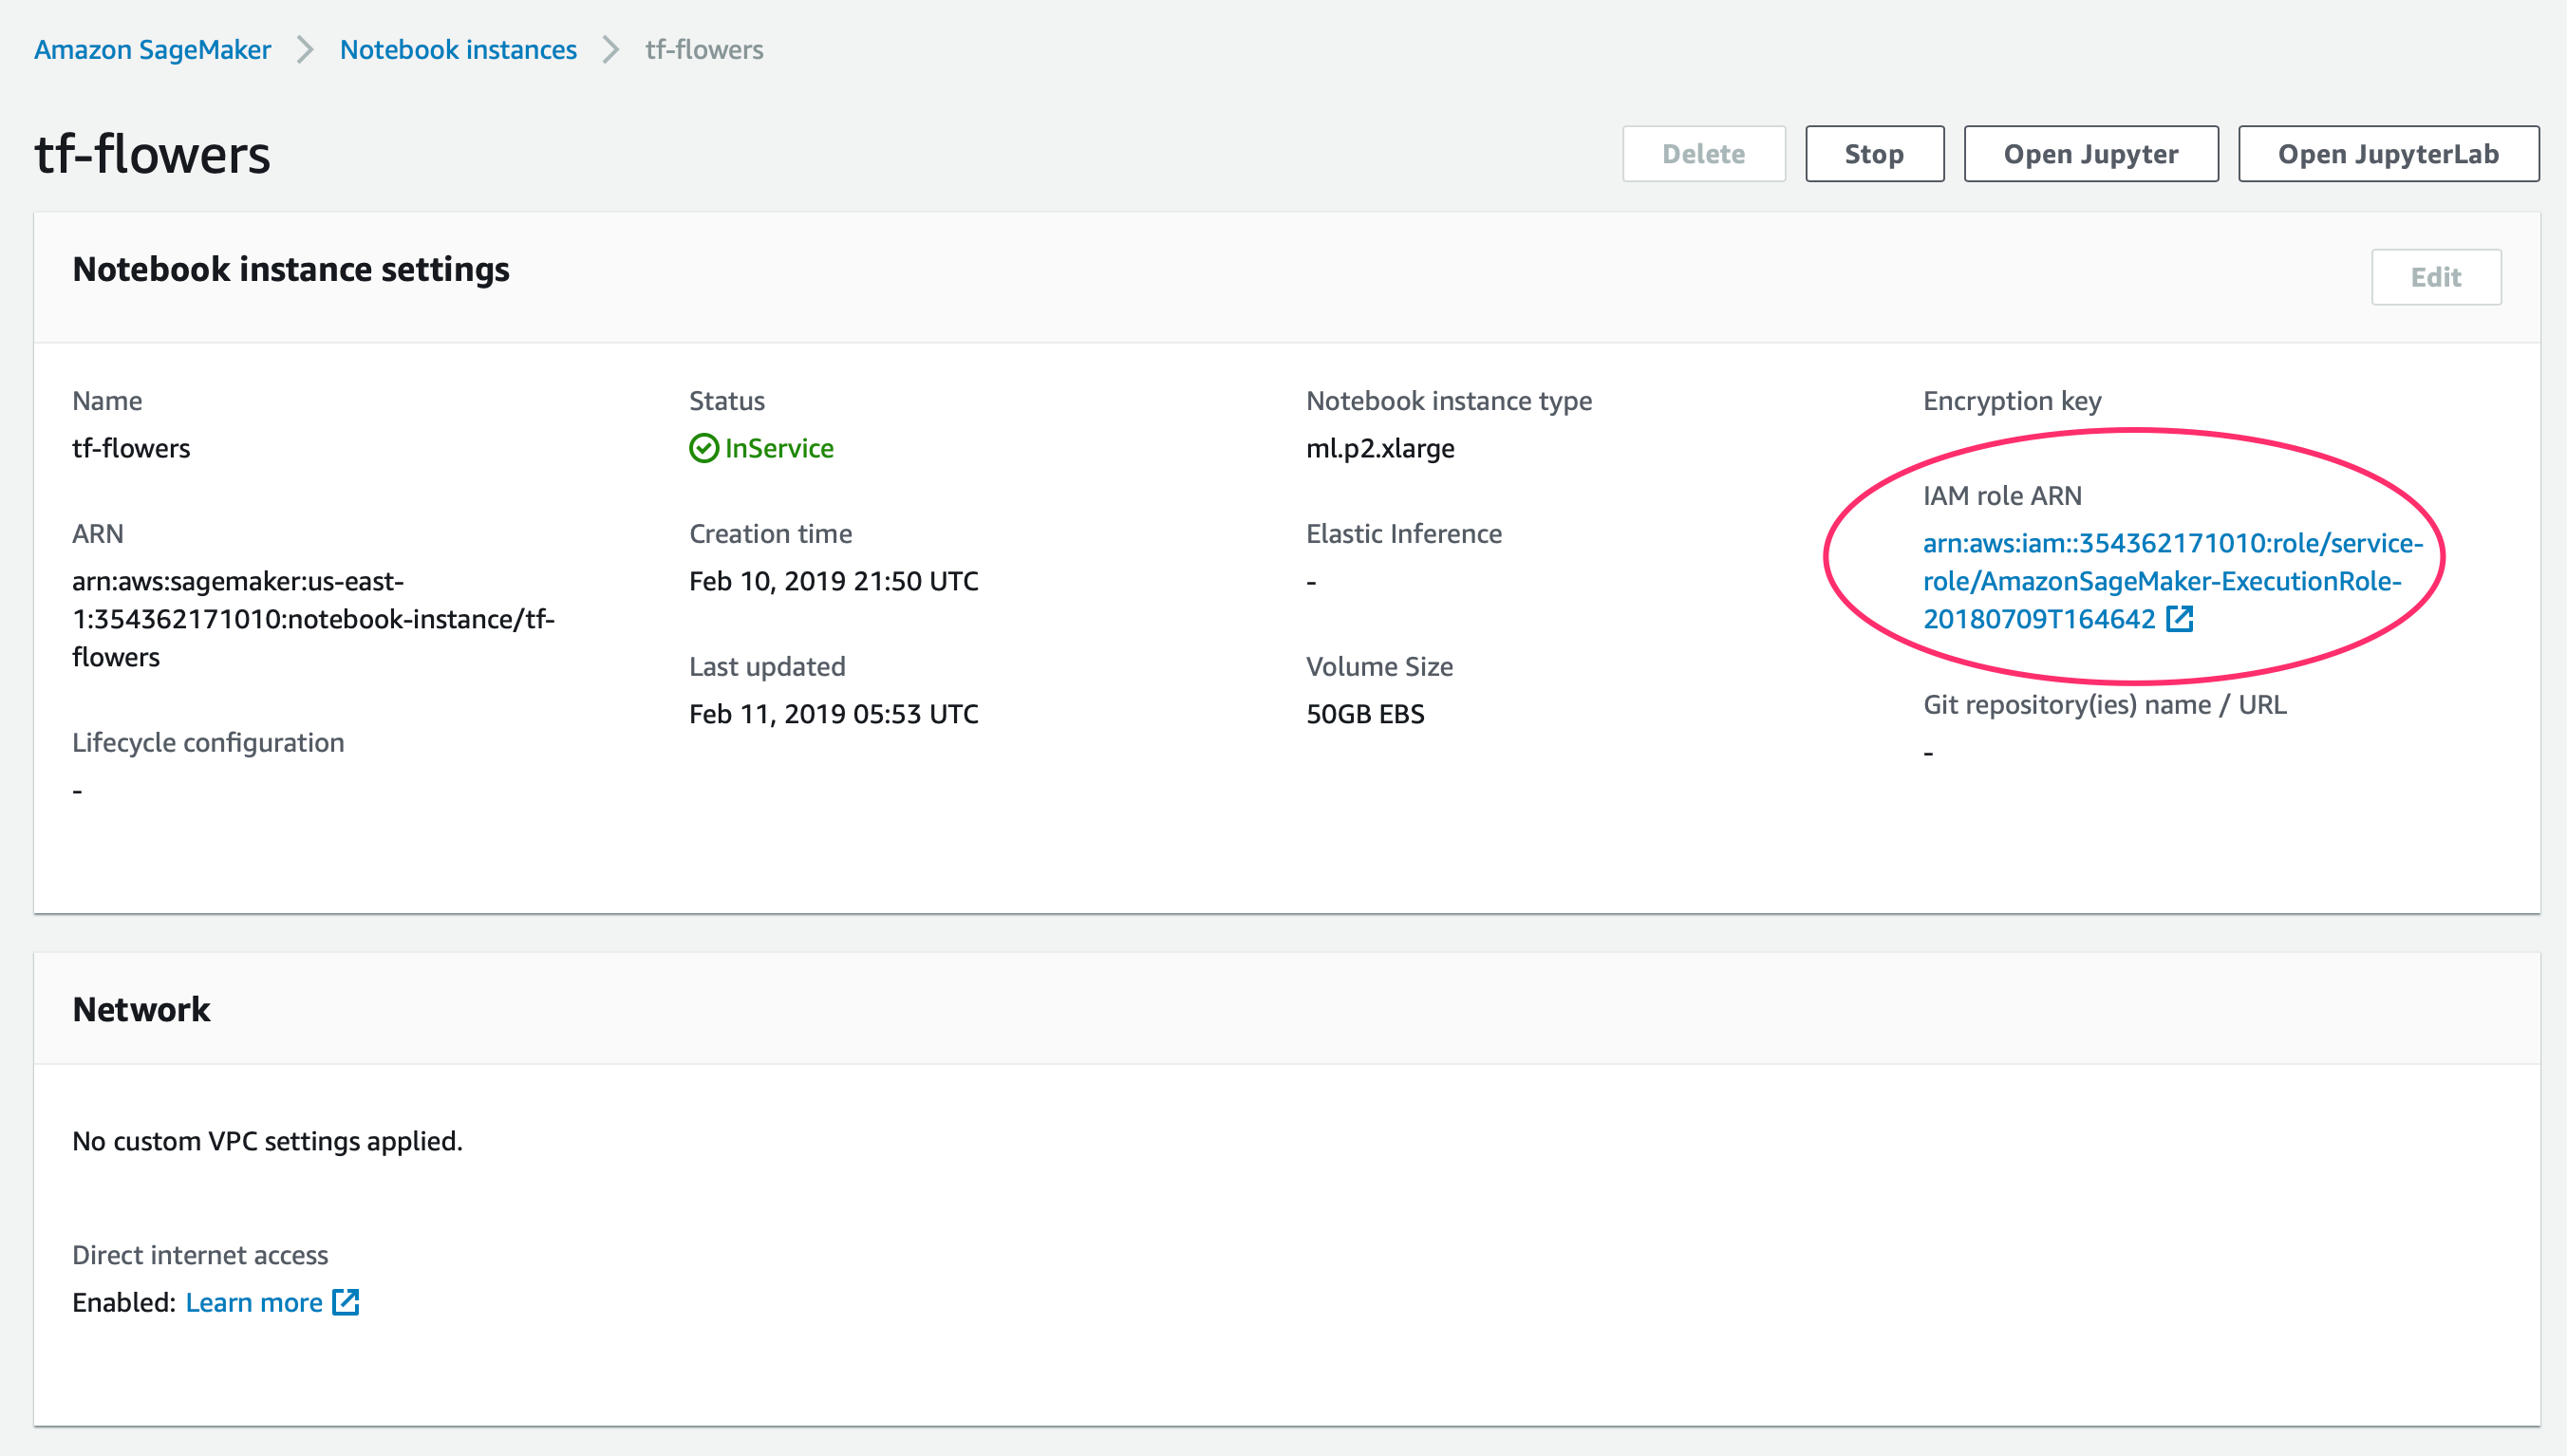
If you get any issues when downloading the dataset from the s3 bucket check
your permissions. I struggled with this. It turns out that there are user
permissions (IAM) but also notebook permissions. You can doublecheck these by
selecting the notebook and reviewing the IAM role ARN.
Once you have a custom trained model you can deploy with Sagemaker. Run the Serving container flower model notebook. This notebook loads the model from disk, formats the model for serving, uploads the formatted model to S3, deploys the model and tests the model by making some predictions.
If everything runs correctly you should have a new entry in Inference >
Endpoints. This an api endpoint you could
send an http request
to using any of the sdks (python, ruby, php, javascript, etc). This model expects
pictures to be 226x226 pixels, so your client must perform image resizing before
querying the endpoint. You could retrain the model to use larger images.
Creating the client requests and changing the model image size are
left as exercises for the reader.
Finally remember to shutdown your notebooks and endpoints to avoid a large aws bill! 💸
If you need help solving your business problems with software read how to hire me.
comments powered by Disqus